OTA Release
This flow covers building a new firmware version, registering it in the platform, and delivering it to a fleet of devices over the air while monitoring progress through each stage of the update.
Involves: Edge OTA, PMS, Embedded Manager, Fleet Manager, Py ToloMEO
Step 1 - Build the firmware
There are two paths to produce an OTA-ready firmware package.
Local build
Follow the BSP and Application Development flow to set up the build environment and produce a firmware image. Once the image builds cleanly, generate the SWUpdate package from it. Two package types are available: a full update that replaces the complete root filesystem, and a delta update that packages only the binary differences from a specific previous version, reducing the bandwidth required for field updates.
The full package generation process, including signing key setup and kas target configuration, is documented in the meta-tolomeo SWUpdate package generation guide. Signing keys must be generated before the first production build; see Hardening and Secure Boot for how to create and configure them.
Via Embedded Manager
Work in progress
Embedded Manager is under active development. Refer to the current state of the UI for what is live.
Trigger the build from within the Embedded Manager and promote the resulting artifact directly to an OTA release using the Promote to OTA button on the build detail view. This skips the manual upload in Step 2 entirely.
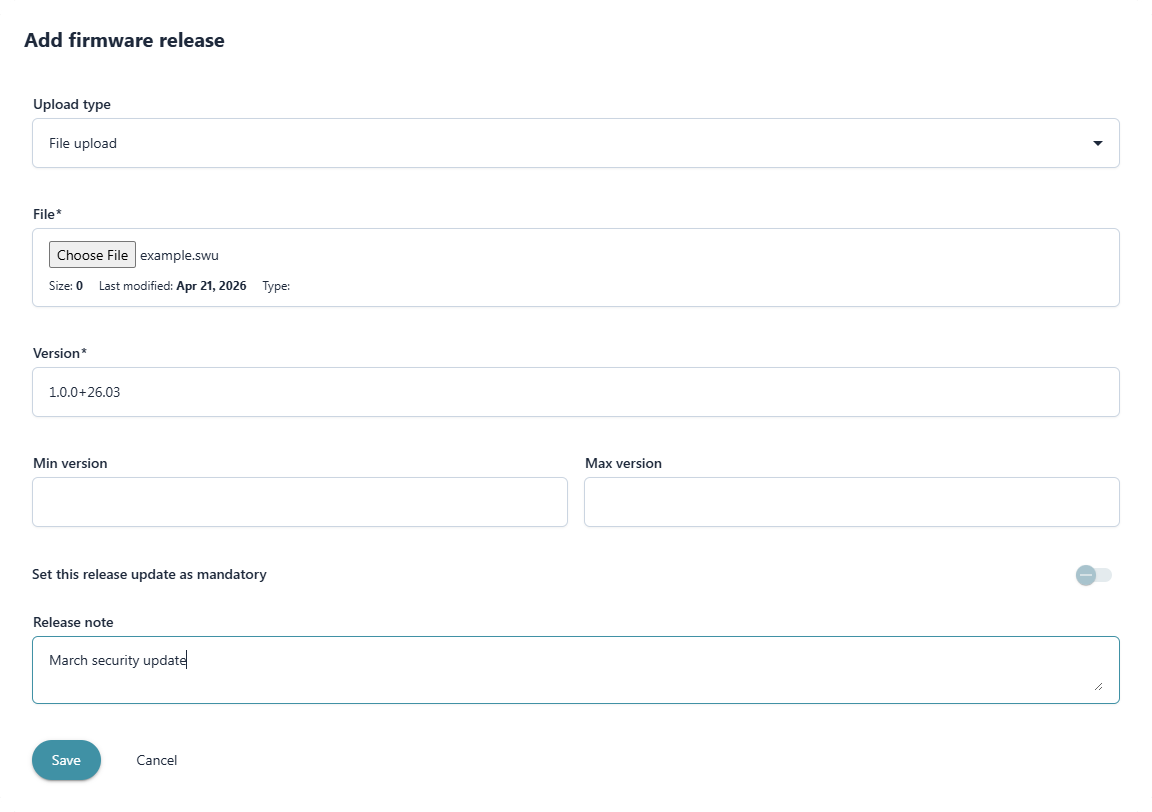
Step 2 - Register the release in PMS
Note
Screenshot of the upload flow to be added.
In PMS Models, open the model that corresponds to the target
hardware and firmware version. Upload the .swu package produced in Step 1. The file is
stored in secure cloud storage and becomes a new firmware release associated with that
model.
If the build was promoted via Embedded Manager, this step is not required as the release is already registered.
Step 3 - Activate the firmware version
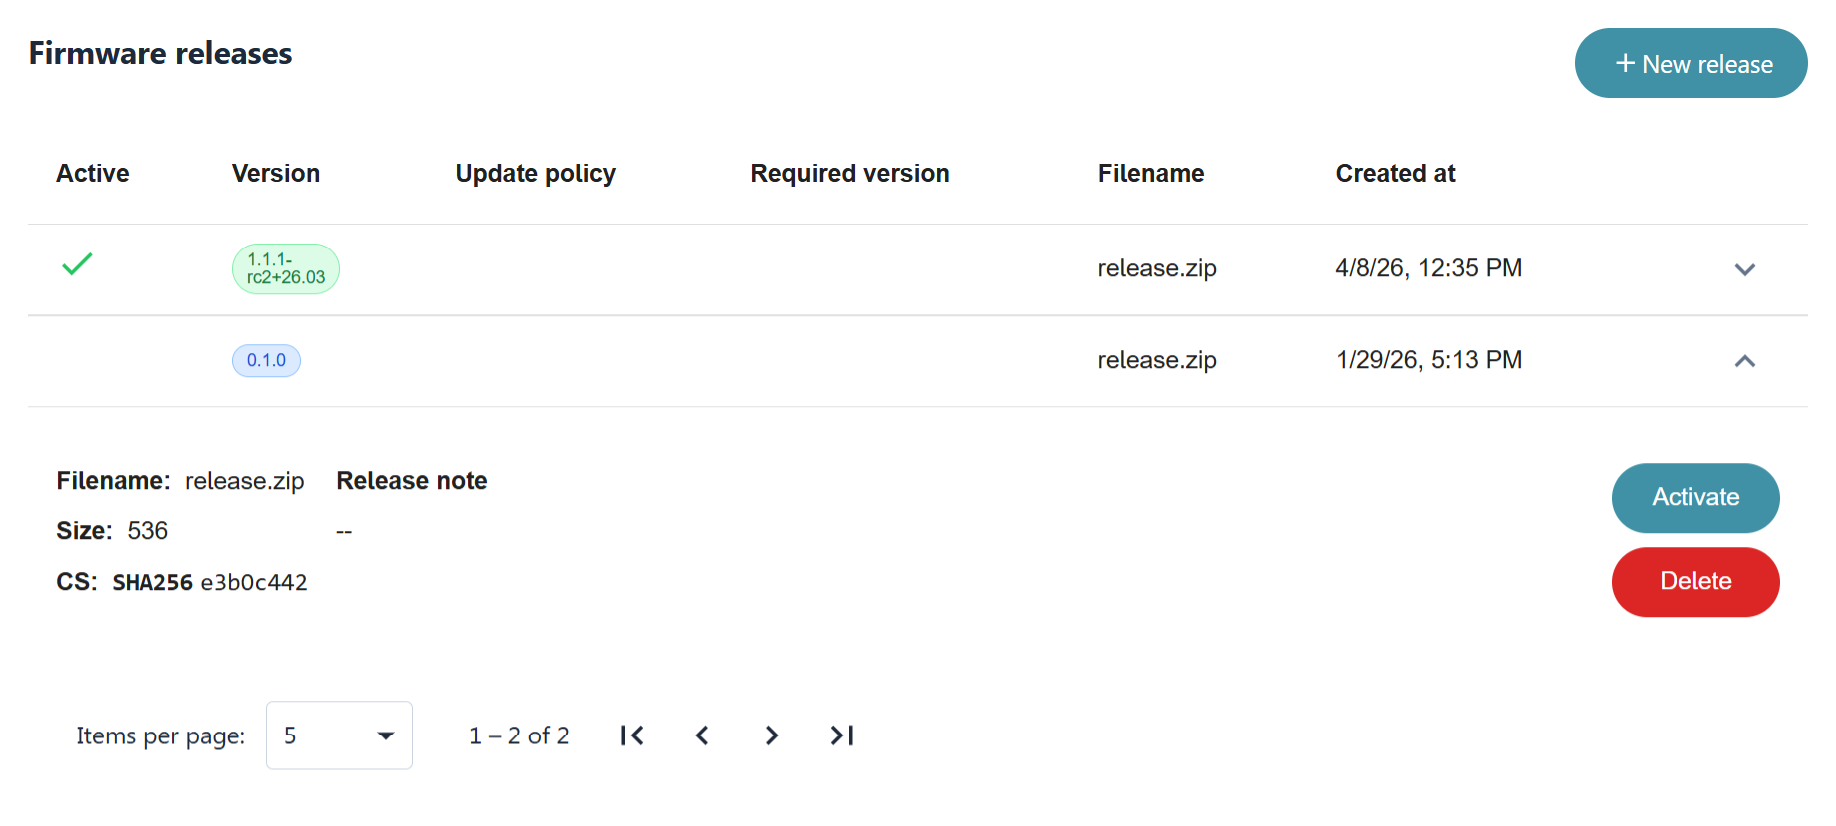
Once the release is registered on the model, activate it. Activation signals to the platform that devices running an older firmware version on this model should receive the update. Devices that are online and provisioned are notified and can begin the update flow described in Steps 4 and 5 via commands.
Step 4 - Drive the update state machine
Once notified of a new version, the on-device OTA client in Py ToloMEO can progress through a state machine. The full state machine and available transitions are documented in the py-tolomeo OTA API reference.
The main states an operator will observe are:
| State | Description |
|---|---|
update_available |
Device has been notified of the new version |
downloading |
The .swu package is being downloaded to the device |
update_ready |
Download complete, waiting for installation to be triggered |
updating |
SWUpdate is writing the package to the inactive partition |
update_successful |
Installation complete, device has rebooted into the new version |
download_failed / update_failed |
A failure occurred at the respective stage |
State transitions can be triggered from the Control panel on the device detail page in
Fleet Manager. Use this to approve the installation once a download completes, to pause a
download in progress, or to send an AbortOTAUpdate command to recover a device from a
failed state before retrying.
Step 5 - Monitor update progress per device
As each device works through the state machine, its current OTA state is visible in the Overview section of its Fleet Manager detail page alongside connectivity and firmware version information.

Once a device reaches update_successful and reboots, its reported firmware version
updates automatically.
Automating the process
The entire OTA flow, from registering a release and activating it to triggering state
machine transitions on individual devices, is accessible via the ToloMEO API. A custom
application or external pipeline can automate the rollout entirely: register and activate a
release on model promotion, wait for devices to reach update_ready, trigger installation in batches,
and monitor outcomes programmatically without any manual intervention through the UI. See
Third-Party Cloud Integration for an overview of what can be built
on top of the API.