Automated Builds with Embedded Manager
The Embedded Manager provides a streamlined way to trigger firmware builds directly from the ToloMEO cloud platform, without managing build infrastructure locally. This flow covers the preconfigured build path, which targets DAVE-managed repositories linked to a specific model.
Prerequisites
The preconfigured build path requires DAVE to have set up and linked the target repository to the corresponding model. Contact DAVE to enable this for your product.
Involves: Embedded Manager, PMS, Cybersecurity
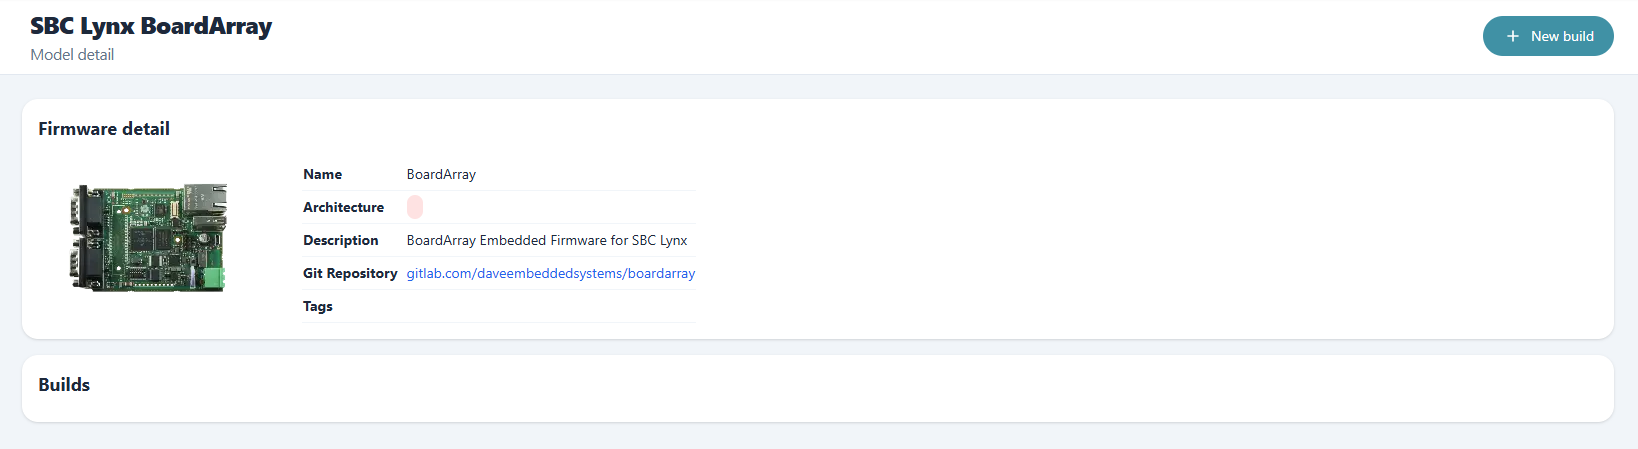
Step 1 - Start a new build
From the Embedded Manager, open the model detail page and click New build. On the build path selection screen, choose Preconfigured.
Step 2 - Configure the build
The preconfigured wizard is split into three screens.
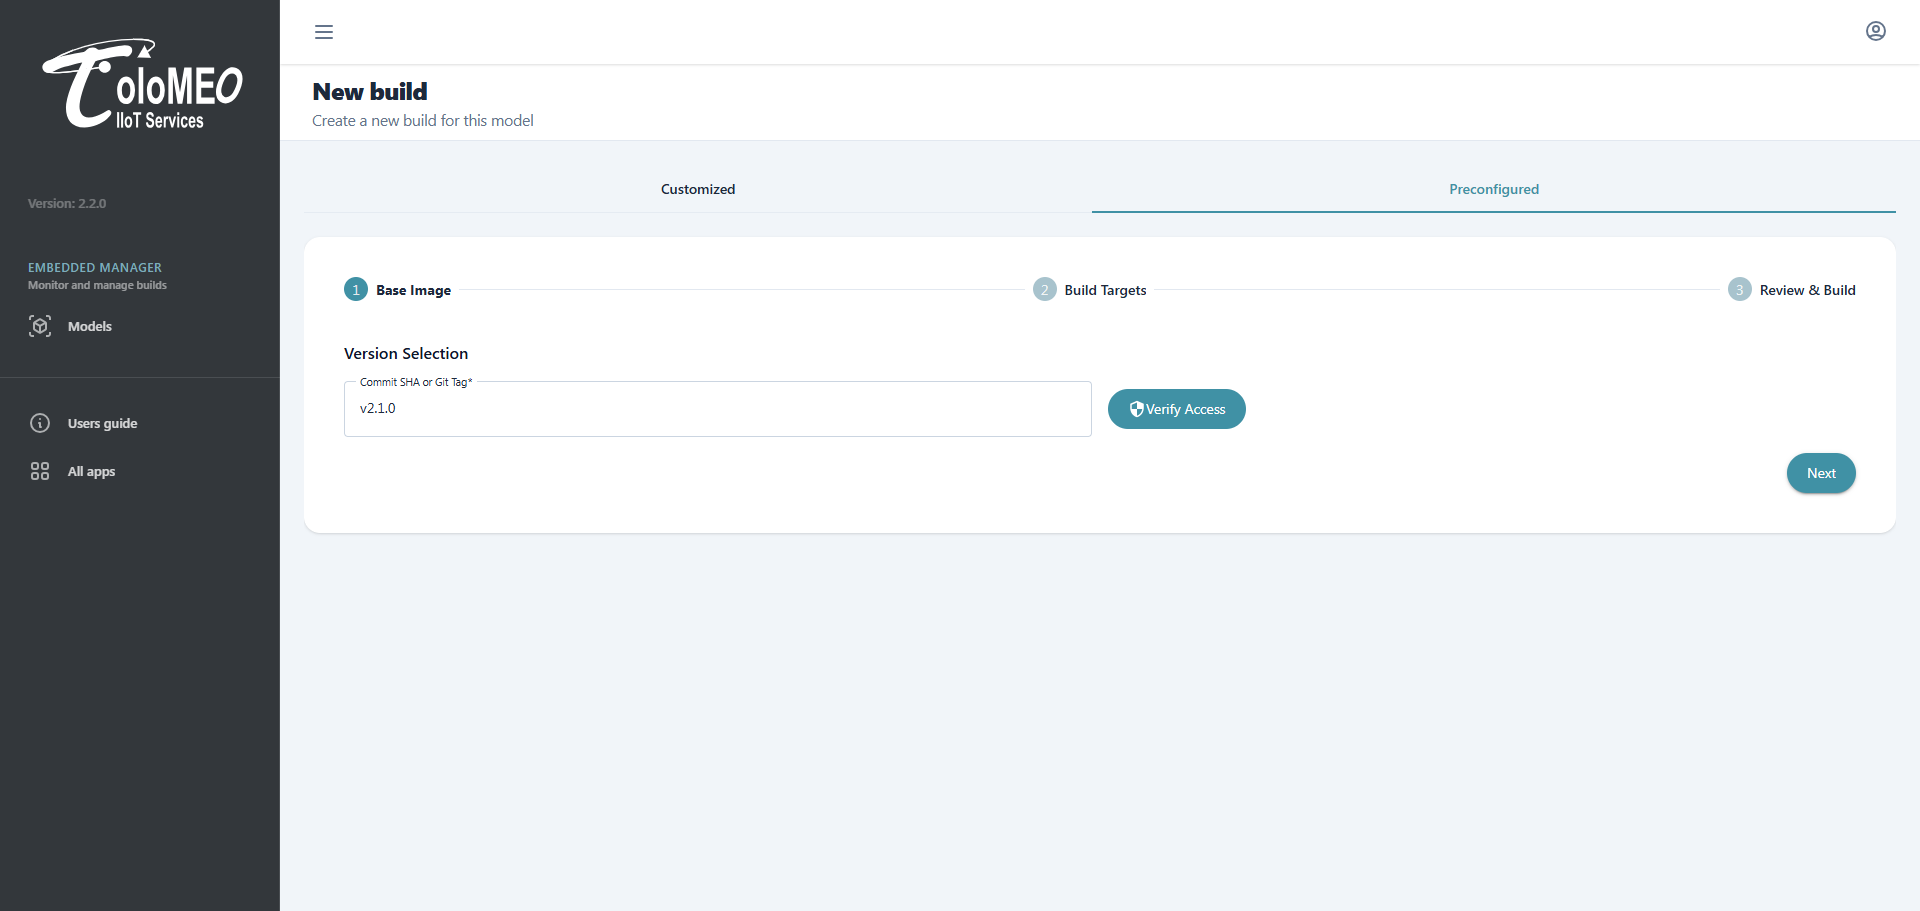
Version selection
Enter the commit SHA or git tag to build from, then click Verify Access to confirm that the build servers can reach the repository. Click Next to proceed.
Build targets
Select which targets to include in this build run. Each target can be configured independently with the following toggles:
- Run Boardfarm Tests
- Run hardware-in-the-loop tests on physical boards after the build completes. Results are attached to the build and visible in the build detail view.
- Require Secureboot Sign
- The firmware image will be signed for secure boot. Depending on your organisation's signing policy, this triggers an approval request to entitled users before signing proceeds.
- Sign Update
- The SWUpdate package will be signed. Available on update targets.
Each selected target also accepts an optional Note for easier identification in the build list.

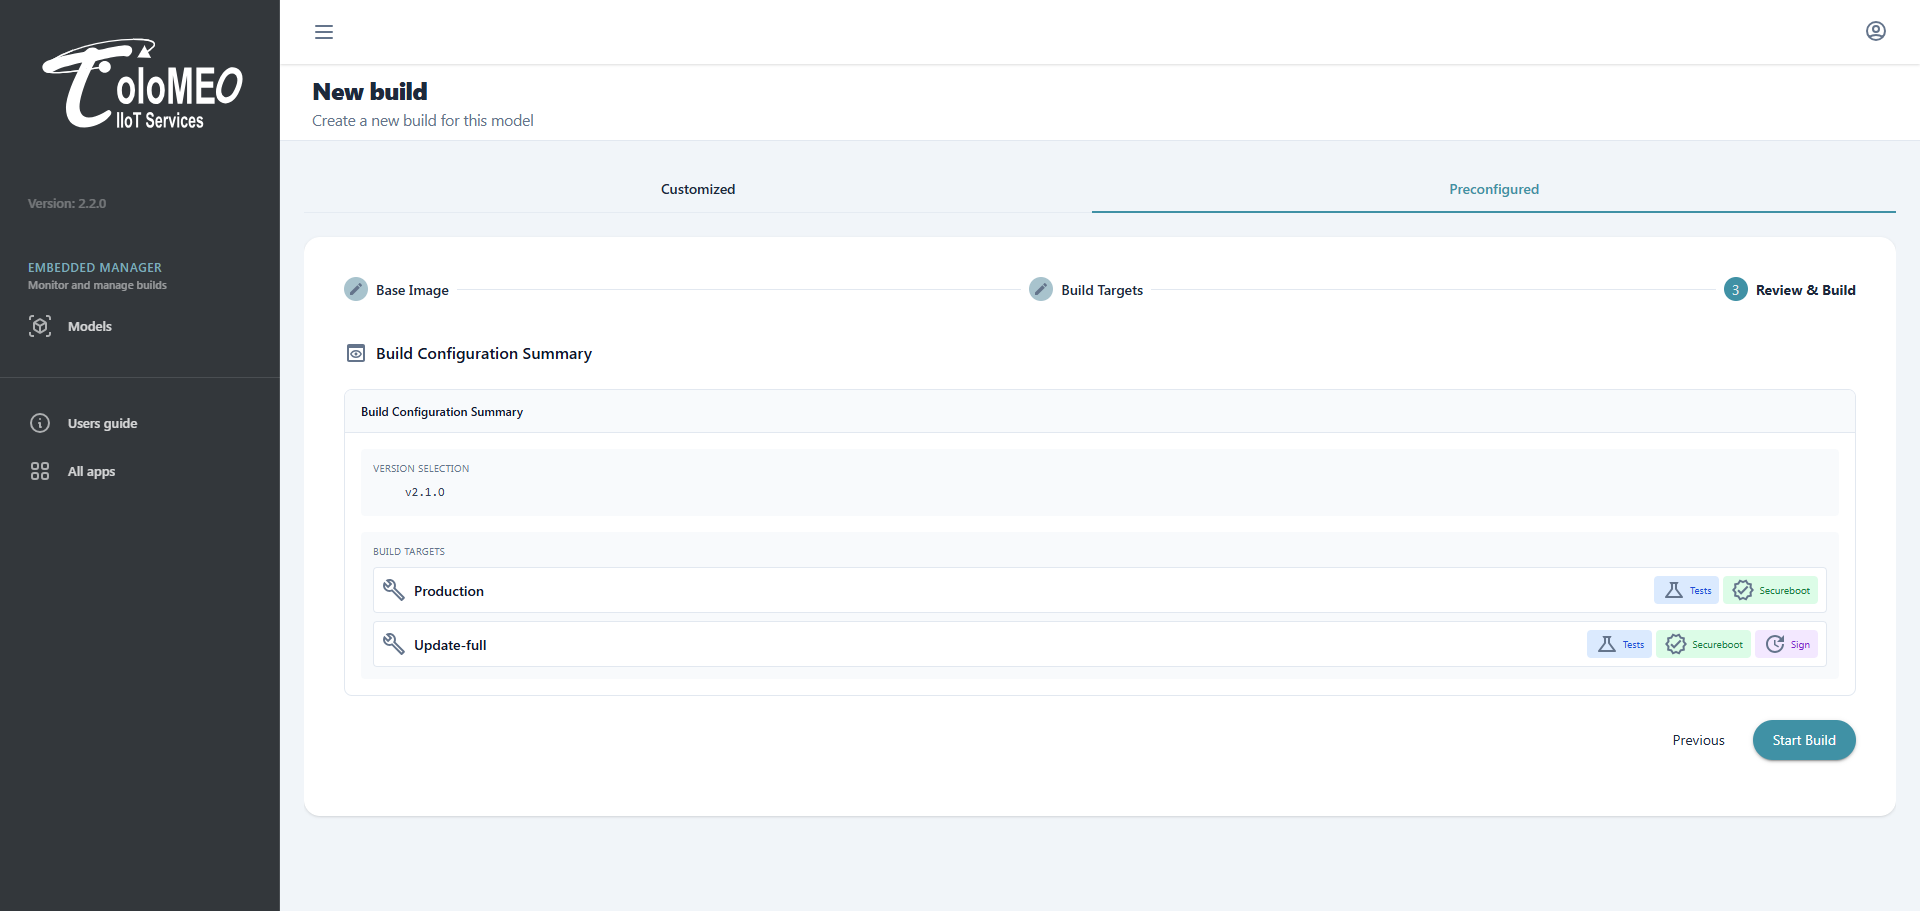
Review and build
The final screen shows the build configuration summary: the selected version and each target with its enabled options. Review the summary and click Start Build.
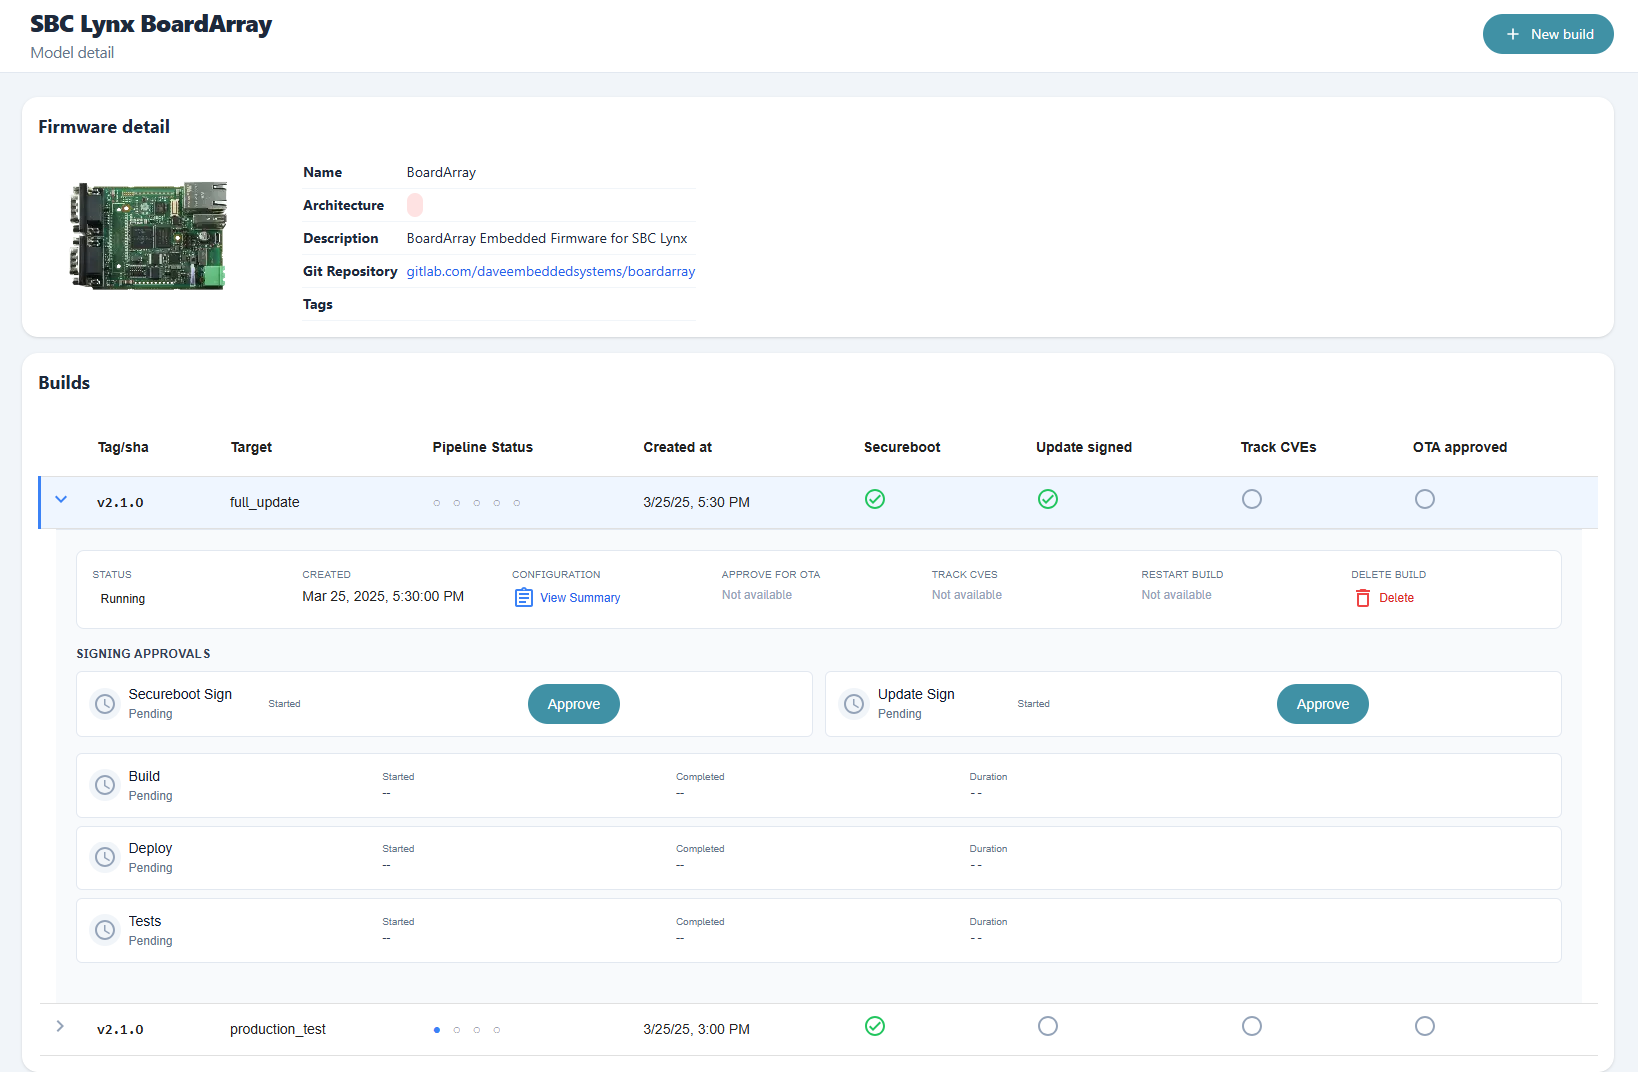
Step 3 - Monitor the pipeline
After submission the platform redirects to the model detail page. The new builds appear immediately with a running status. Each build entry shows the pipeline stage progress and the status of signing approvals.
If secure boot or update signing was requested and you have the required permissions, Approve buttons appear in the expanded build row. Review and approve to unblock the pipeline.
Step 4 - Review a completed build
Once a build completes its row shows a success status and all pipeline stages checked. Expand the build to access:
- Download logs -- full pipeline output for each stage
- Download artifacts -- firmware images and SWUpdate packages
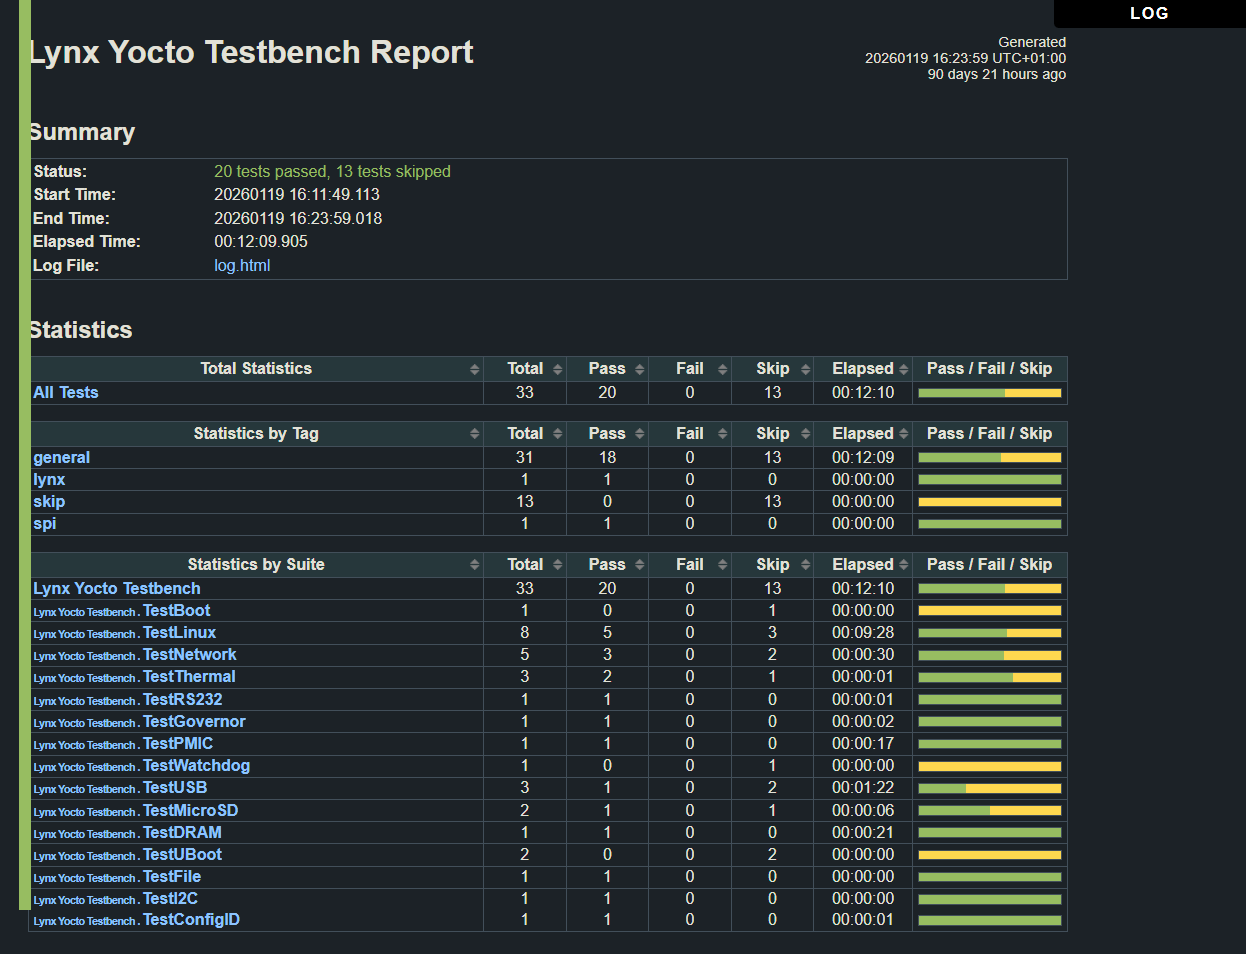
- View test report -- BoardFarm test results, if tests were requested
A running or failed build can be stopped or deleted at any time using the Delete action on the build row.
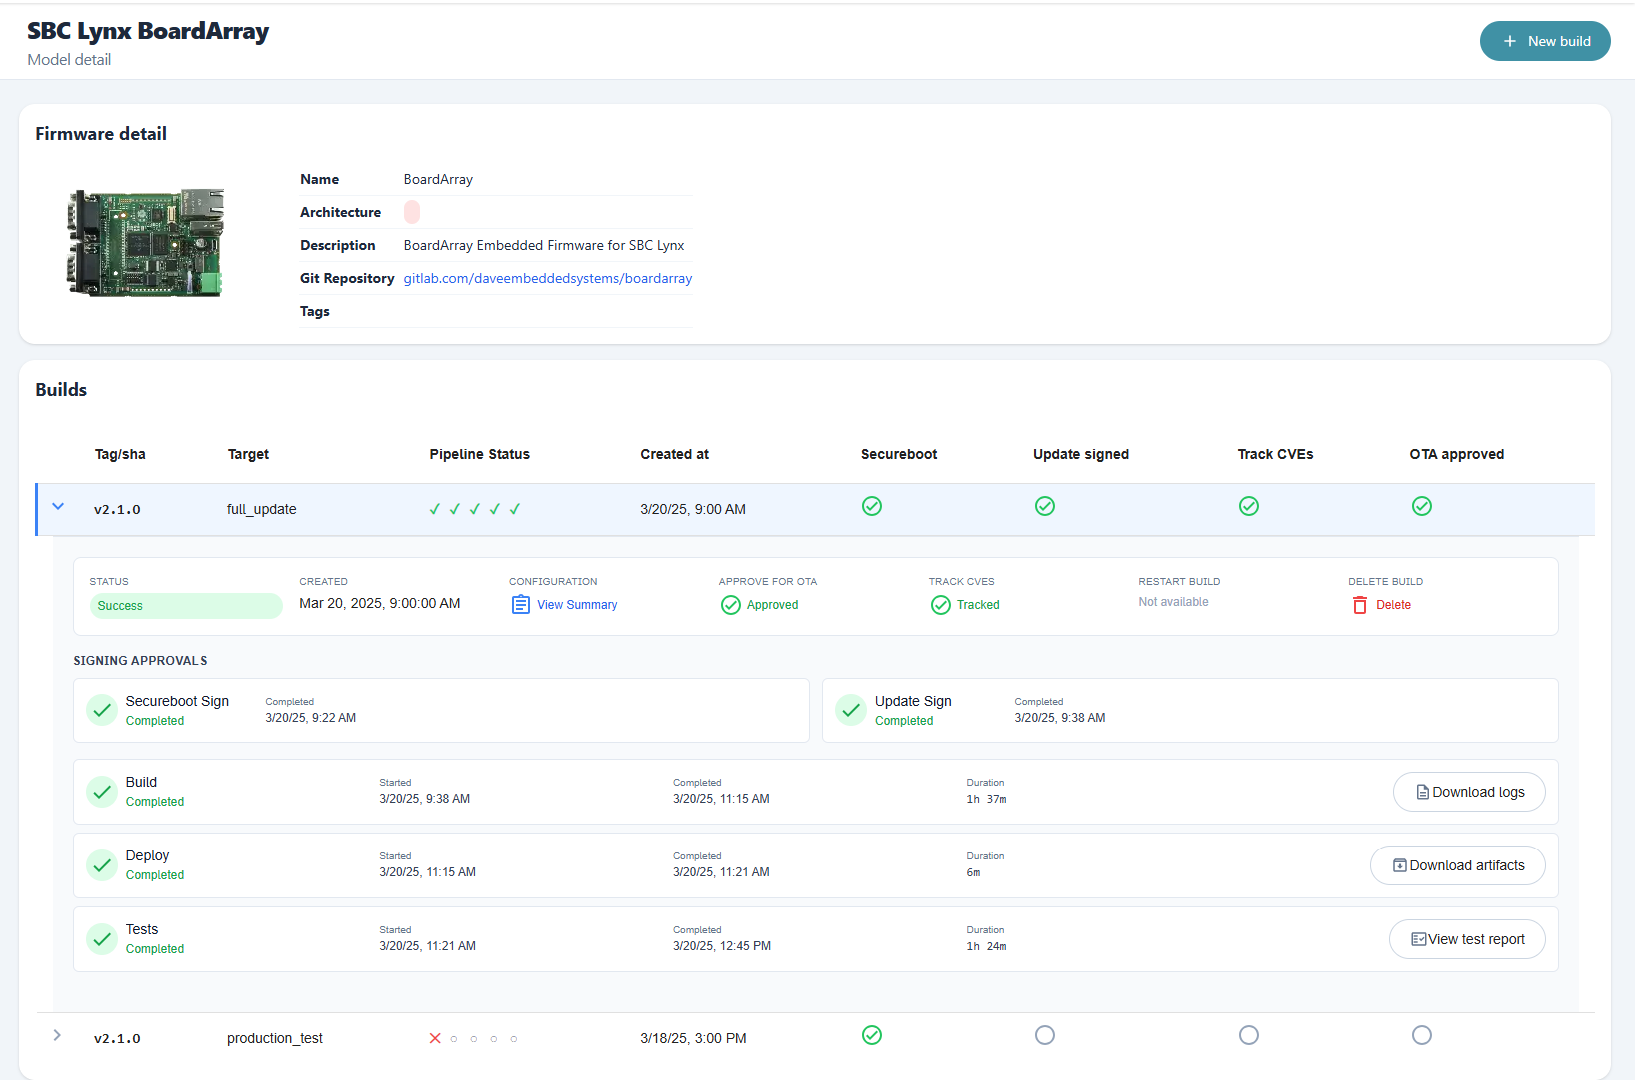
Step 5 - Promote to OTA and track the SBOM
A successful build can be promoted from the build detail view using Approve for OTA. This registers the firmware as a release on the linked model in PMS Models, making it available for delivery to devices.
Promoting a build also triggers SBOM and VEX ingestion in Cybersecurity, where the new firmware version receives its own vulnerability tracking project. CVE findings, triage, and alarms are all available from that point on.